This article starts a short series on how to set up and configure an environment for automated testing of your data processing pipeline.
Prerequisites
Whilst there are many different tools out there to choose from (for data processing, CI server and git server), I picked the ones that I am more familiar with. This is a fairly classic setup. Your environment might be totally different and your tools might support a lot of the functionality shown here as integrated services - in which case I think you can just read this article to get a general idea about automating testing and then apply the learnings to your particular setup. If you are, however, working with all or some of the tools that I picked for this example, the article will help you to set up a prototype environment.
The tools I picked for this practical example are:
- Data Integration Tool: Kettle/Pentaho Data Integration/Project Hob (yes, so many names for the same tool!)
- CI Server: Jenkins
- Git Server: GitLab CE
Instructions below are provided in case you want to prototype a local environment: We will be working with Docker containers, so make sure you have Docker installed on your system.
Running Kettle via Docker
Hitachi Vantara is quite late in the game of providing a Docker image. Well, to be precise, they don’t provide the Docker image, but instructions on how to build one yourself, but this is a big step forward into the right direction. Alexander Schurman - one of the most outstanding experts on everything Pentaho that I know - created the blueprint for these Docker instructions. I’ll go for the simplest setup here to keep it brief:
Let’s create a dedicated folder to store any files that we want to load into the container, e.g.:
/Users/diethardsteiner/docker-storage/pdi-base
We define an variable called DOCKER_PDI_BUILD_BASE to hold this path:
DOCKER_PDI_BUILD_BASE=/Users/diethardsteiner/docker-storage/pdi-base
Download the open source/CE version of PDI or alternatively Project Hop:
Extract the zip file and move or copy the data-integration folder to the DOCKER_PDI_BUILD_BASE/resources folder.
Next create a file called Dockerfile in the DOCKER_PDI_BUILD_BASE folder and add following content (this is for Pentaho Data Integration - if you decide to use Project Hop adjust accordingly):
# Dockerfile to build slim Pentaho 8.3 Image for Execution
FROM openjdk:8-alpine
ENV PENTAHO_VERSION=8.3
ENV PENTAHO_TAG=8.3.0.0-371
ENV PENTAHO_HOME=/opt/pentaho
ENV PDI_HOME=/opt/pentaho/data-integration
ENV PENTAHO_JAVA_HOME=$JAVA_HOME
# This setting avoids having the WEBKITGTK warning on the Logs
ENV SKIP_WEBKITGTK_CHECK=1
# OPTIONAL
# The “-XX:+AggressiveHeap” tells the container to use all memory assigned to the container.
# this removed the need to calculate the necessary heap Xmx
ENV PENTAHO_DI_JAVA_OPTIONS=-XX:+AggressiveHeap
RUN apk update; apk add --no-cache bash curl bc procps; rm -rf /var/cache/apk/*
RUN mkdir ${PENTAHO_HOME}; adduser -D -s /bin/bash -h ${PENTAHO_HOME} pentaho; chown pentaho:pentaho ${PENTAHO_HOME}
COPY --chown=pentaho:pentaho ./resources/ ${PENTAHO_HOME}
USER pentaho
ENV PATH=$PATH:/opt/pentaho/data-integration
WORKDIR /opt/pentaho/data-integration
Open the Terminal and navigate to the DOCKER_PDI_BUILD_BASE folder, then run this command to build the image:
docker build -t pentaho/pdi:8.3 .
Now we have a base Docker image ready and can add an additional layer with customisations for each client (I created this very simple layer as an example - you could of course add a lot more customisation: Normally you’d add specific JDBC drivers, plugins, properties etc):
Again, we create a folder to store any files that we want to load into the container, e.g.:
/Users/diethardsteiner/docker-storage/pdi-client-a
We define an environment called DOCKER_PDI_CLIENT_A to hold this path:
DOCKER_PDI_CLIENT_A=/Users/diethardsteiner/docker-storage/pdi-client-a
Inside this folder create a folder called resources and within this one a file called load_and_execute.sh: This will serve as the ENTRYPOINT to our container. With the help of this shell script we can “send” our data pipeline code/instructions (so Kettle jobs and transformations) to the container, which then will be submitted to kitchen.sh, PDI’s command line client.
To achieve this, we will mount a volume to the container that is also available on our workstation (so it’s shared between both environments). We can place our jobs and transformations that we want to run via the container in this shared folder. We will define the container in such a way that it accepts an environment variable called PROJECT_STARTUP_JOB. The purpose of this variable is to define the name (and location) of the job we want to execute (this job will be stored in the shared folder). Then in our load_and_execute.sh we can refer to this variable.
Note: The idea behind this setup is that the container runs when a job has to be executed. Once this is completed, the container shuts down again.
The load_and_execute.sh should contain following content:
#!/bin/bash
#######################################################################
# "PROJECT_STARTUP_JOB"
# path to Kettle job from within volume
#
# "KETTLE_LOG_LEVEL"
# values are [Basic / Debug]
#######################################################################


BASENAME="${0##*/}"

# Standard function to print an error and exit with a failing return code
error_exit () {
  echo "${BASENAME} - ${1}" >&2
  exit 1
}

# retrieve files from volume
# ... done via Dockerfile via specifying a volume ...

# Run main job
kitchen.sh \
  -file=/opt/pentaho/project/${PROJECT_STARTUP_JOB} \
  -level=${KETTLE_LOG_LEVEL}
Next create this Dockerfile in DOCKER_PDI_CLIENT_A:
FROM pentaho/pdi:8.3
ENV PROJECT_STARTUP_JOB=
ENV KETTLE_LOG_LEVEL=Basic
USER root
COPY --chown=pentaho:pentaho ./resources/ ${PENTAHO_HOME}
RUN apk update; apk add --no-cache wget python groff; rm -rf /var/cache/apk/*
RUN wget https://bootstrap.pypa.io/get-pip.py; python get-pip.py; pip install awscli; rm -f get- pip.py
VOLUME ["/opt/pentaho/project"]
USER pentaho
ENTRYPOINT ["/opt/pentaho/load_and_execute.sh"]
Build the image:
docker build -t pentaho/pdi-client-a:8.3 .
To test this setup I created a very simple job and transformation that reads in a text file with one integer value, adds 1 to it and writes the result out to a text file. I saved the job and transformation in /Users/diethardsteiner/docker-storage/pdi-project which I will map to the Docker volume.
Start the container and run my data process I issued following command:
docker run \
  -it\
  --rm \
  --env PROJECT_STARTUP_JOB=main.kjb \
  --env KETTLE_LOG_LEVEL=Basic \
  -v /Users/diethardsteiner/docker-storage/pdi-project:/opt/pentaho/project \
  --name pdi-client-a \
  pentaho/pdi-client-a:8.3
Running Jenkins via Docker
Pull the image:
docker pull jenkins/jenkins:lts-alpine
Then start the container (Adjust to your environment):
docker run \
  --detach \
  -p 8089:8080 \
  -p 50000:50000 \
  -v /Users/diethardsteiner/docker-storage/jenkins_home:/var/jenkins_home \
  --name jenkins \
  jenkins/jenkins:lts-alpine
The initialisation process may take a long time. You can track this process with the command:
docker logs -f jenkins
Watch the log also for the auto-generated password, e.g.:
2020-01-16 12:31:17.694+0000 [id=30]	INFO	jenkins.install.SetupWizard#init:

*************************************************************
*************************************************************
*************************************************************

Jenkins initial setup is required. An admin user has been created and a password generated.
Please use the following password to proceed to installation:

c569f3c600db42d1be6bdd51f66814f3

This may also be found at: /var/jenkins_home/secrets/initialAdminPassword

*************************************************************
*************************************************************
*************************************************************
The web interface will be available via:
http://localhost:8089
Use the admin user and the auto-generated password from the log.
Running GitLab via Docker
I’ll be using GitLab Community Edition as an example. For info on the Docker image see here and more specifically here and finally - most importantly - this guide on how to use the image.
Pull a specific version of the image:
docker pull gitlab/gitlab-ce:12.6.4-ce.0
Start the container (adjust to your environment):
docker run \
  --detach \
  --hostname localhost \
  --publish 443:443 --publish 80:80 --publish 22:22 \
  --name gitlab \
  --volume /Users/diethardsteiner/docker-storage/gitlab/config:/etc/gitlab \
  --volume /Users/diethardsteiner/docker-storage/gitlab/logs:/var/log/gitlab \
  --volume /Users/diethardsteiner/docker-storage/gitlab/data:/var/opt/gitlab \
  gitlab/gitlab-ce:12.6.4-ce.0
The initialisation process may take a long time. You can track this process with the command:
docker logs -f gitlab
The web interface will be available via:
http://localhost:80
When you first visit the web interface, you’ll be asked to set a new password. You can then login with the root user.
If you want to map to different host ports (e.g. here I map to 8081 on the host), do this instead:
docker run \
  --detach \
  --hostname localhost \
  --publish 443:443 --publish 8081:80 --publish 22:22 \
  --name gitlab \
  --volume /Users/diethardsteiner/docker-storage/gitlab/config:/etc/gitlab \
  --volume /Users/diethardsteiner/docker-storage/gitlab/logs:/var/log/gitlab \
  --volume /Users/diethardsteiner/docker-storage/gitlab/data:/var/opt/gitlab \
  gitlab/gitlab-ce:12.6.4-ce.0
Since the config files are also available on our host (we defined a volume mapping above), we can open the config file directly on our host to adjust the external port there as well (there is no need to log into the container). In my case this is:
vi /Users/diethardsteiner/docker-storage/gitlab/config/gitlab.rb
Now set external_url to the respective value, e.g.:
external_url "http://localhost:8081"
Linking Jenkins with GitLab
Find detailed docu in this article: Jenkins CI service.
You have to install the Jenkins GitLab plugin and Git plugin. Last one is installed by default.
Create dedicated Jenkins user on GitLab and get Access Token
- Via the GitLab web UI create a dedicated
jenkinsuser with Admin privileges (or alternatively add this user as a member to each group or project) and also set the password for this user.

- Get the API Key: Login with the
jenkinsuser. Click on the avatar in the top right corner and go to Settings.

- From the left hand side menu choose Access Tokens: Provide a name and tick api.

- Then click on Create personal access token. Go to the top of the page to copy the generated token.

Configure Jenkins
This README and the accompanying blog post were a very useful articles on configuring this correctly.
- Log on to the Jenkins Web UI.
- Click on Manage Jenkins and then on Configure System . Scroll down to the GitLab section.
- First uncheck Enable authentication for project Endpoint. This way the webhooks work without a token.
- Specify the Connection name. We can refer to this one from our Jenkins jobs or pipelines.
- Enter the GitLab server URL in the GitLab host URL field.
Important: “If you are getting any error, check the url of gitlab. It should not be localhost. Since we are running gitlab and jenkins through docker, jenkins and gitlab are running in the LAN of docker. Jenkins needs to refer to gitlab within that network. So, to get the address of gitlab, in bash of gitlab, find the url at
/etc/hostsfile. Enter that url here.” (Source)
  % docker exec -it gitlab bash
  root@localhost:/# cat /etc/hosts
  127.0.0.1	localhost
  ::1	localhost ip6-localhost ip6-loopback
  fe00::0	ip6-localnet
  ff00::0	ip6-mcastprefix
  ff02::1	ip6-allnodes
  ff02::2	ip6-allrouters
  172.17.0.3	localhost
In my case I used the IP 172.17.0.3.
- In the credentials section click on Add and pick Jenkins. From the pop-up window choose GitLab API token from the Kind pull-down menu and paste the API token copied earlier in the API Token field. Finally provide a unique identifier (ID - can be anything you like) and click Add. Then just above the Add button (now in the GitLab section again) click on the pull down menu for Credentials and choose the ID you created earlier on.
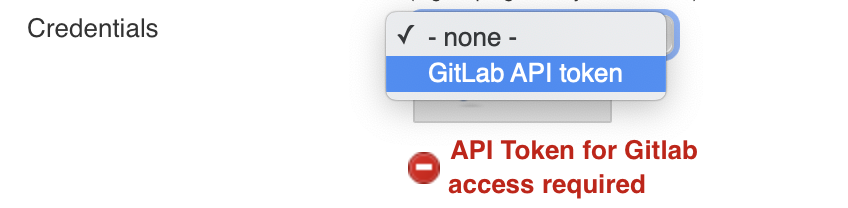
The settings should looks similar to the ones shown on the screenshot below:

Click on Test Connection. If all is ok, click on Save.
We have set up Kettle, GitLab and Jenkins - all running in Docker containers. We successfully configured Jenkins and GitLab so that they can talk to each other. The next step is to apply automated testing principles to a project, which we will cover in part 2 of this series.
Artefacts
Git repos: