Kubernetes is the rising star when it comes to container deployment. In this article we will take a look at how to deploy Pentaho Data Integration’s Webspoon to the Google Cloud Platform using Kubernetes.
We can find the Webspoon Docker Image here. Since we want a reproducable deployment, we must not use the :lastest tag but a more specific one, e.g. 0.8.0.13-full. A list of available tags can be found here.
Hiromu mentions in regards to tags: “0.8.0-base does not include spoon.war, please use 0.8.0.13-full instead. As of today (2018-02-04), latest is the same as 0.8.0.13 and latest-full is the same as 0.8.0.13-full. latest and latest-full are changing: they always refer to the latest released version. latest only has spoon.war and latest-full includes plugins too. 0.8.0-base does not include spoon.war because spoon.war is changing and those plugins are not. Under these settings, the next release (0.8.0.14-full) is only different (from 0.8.0.13-full) in spoon.war because they stem from the same 0.8.0-base. This makes upload/download much smaller.”
We will start in a simple fashion by creating a Deployment to house our Webspoon Docker container. Our first attempt will be to define our environment in a imperative way (which is not best practice). Later, we will express our environment in a declarative way and save the file to our git repo. Whenever we make changes to this file, we commit it. This way we keep a history of deployments. If you want to use the cutting edge version, please use nightly-full. This is based on the very latest commit. Note that I haven’t uploaded nighly because I think most of users use -full tags.”
If you wish, you can read up on some background info here:
- Google Kubernetes Engine
- Google Kubernetes Engine Docs
- GCP Kubernetes Quickstart
- Gloud Command Line Client
- kubectl command overview
To set up a new cluster/environment, we can use the following tools:
- Web UI
- REST API
- command line:
- Google Cloud Shell
- local command line
We will go with the last option.
Getting Ready
Register with the Google Cloud Platform or via GCP Console.
Install the Cloud SDK by following one of the Quickstart Guides.
Here are the commands I ran on Fedora (again, pick the right Quickstarter Guide for your OS):
# Update YUM with Cloud SDK repo information:
sudo tee -a /etc/yum.repos.d/google-cloud-sdk.repo << EOM
[google-cloud-sdk]
name=Google Cloud SDK
baseurl=https://packages.cloud.google.com/yum/repos/cloud-sdk-el7-x86_64
enabled=1
gpgcheck=1
repo_gpgcheck=1
gpgkey=https://packages.cloud.google.com/yum/doc/yum-key.gpg
       https://packages.cloud.google.com/yum/doc/rpm-package-key.gpg
EOM

# The indentation for the 2nd line of gpgkey is important.

# Install the Cloud SDK
# gcloud components install kubectl => error, used this instead:
sudo dnf install kubectl
Imperative Approach
This is not considered best practice. We will only use this for a quick prototype and then switch to the declarative approach:
# create project
gcloud projects create kubwebspoon
# OR if project already exist, set project id
gcloud config set project kubwebspoon
# set compute zone
# list of available zones
# https://cloud.google.com/compute/docs/regions-zones/#available
gcloud config set compute/zone us-west1-a
Next we will create our Kubernetes cluster. While the gcloud container clusters create command provides defaults for many settings, you might want to define the machine type and the number of nodes.
You can find info on the GCP machine types here or alternatively you can run this command:
gcloud compute machine-types list
Let’s create a cluster with 3 nodes and machine type n1-standard-1 :
# create kubernetes engine cluster
# running command again after enabling API
gcloud container clusters create webspoon-cluster --machine-type=n1-standard-1 --num-nodes=3
At this stage I got following error:
ERROR: (gcloud.container.clusters.create) ResponseError: code=403, message=The Kubernetes Engine API is not enabled for project kubwebspoon. Please ensure it is enabled in the Google Cloud Console at https://console.cloud.google.com/apis/api/container.googleapis.com/overview?project=kubwebspoon and try again.
Open the link shown above in a web browser:
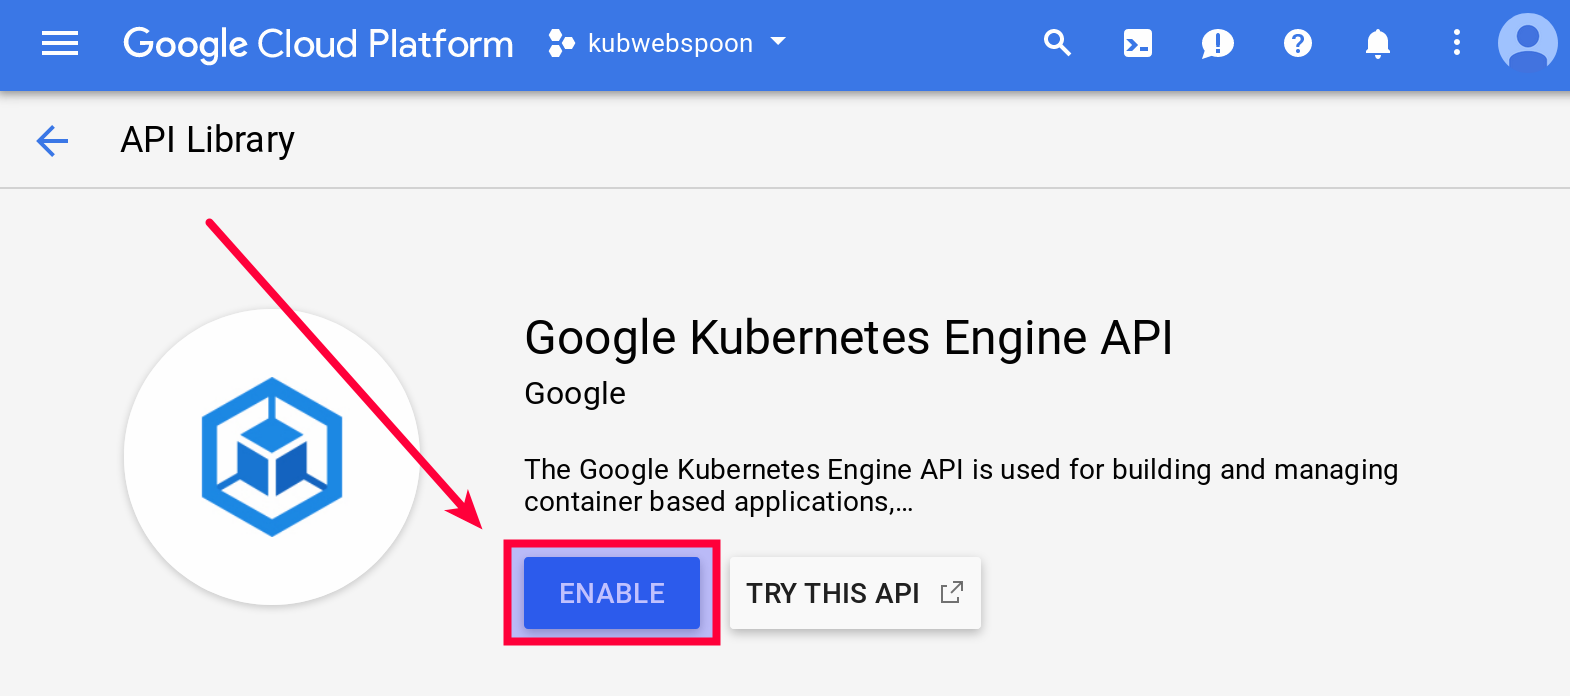
Click on Enable. It will ask you to link this project to a billing account, which you will have to confirm to proceed.
It will take some time for the Google Kubernetes Engine API to be enabled.
# create kubernetes engine cluster
# running command again after enabling API
gcloud container clusters create webspoon-cluster --machine-type=n1-standard-1 --num-nodes=3
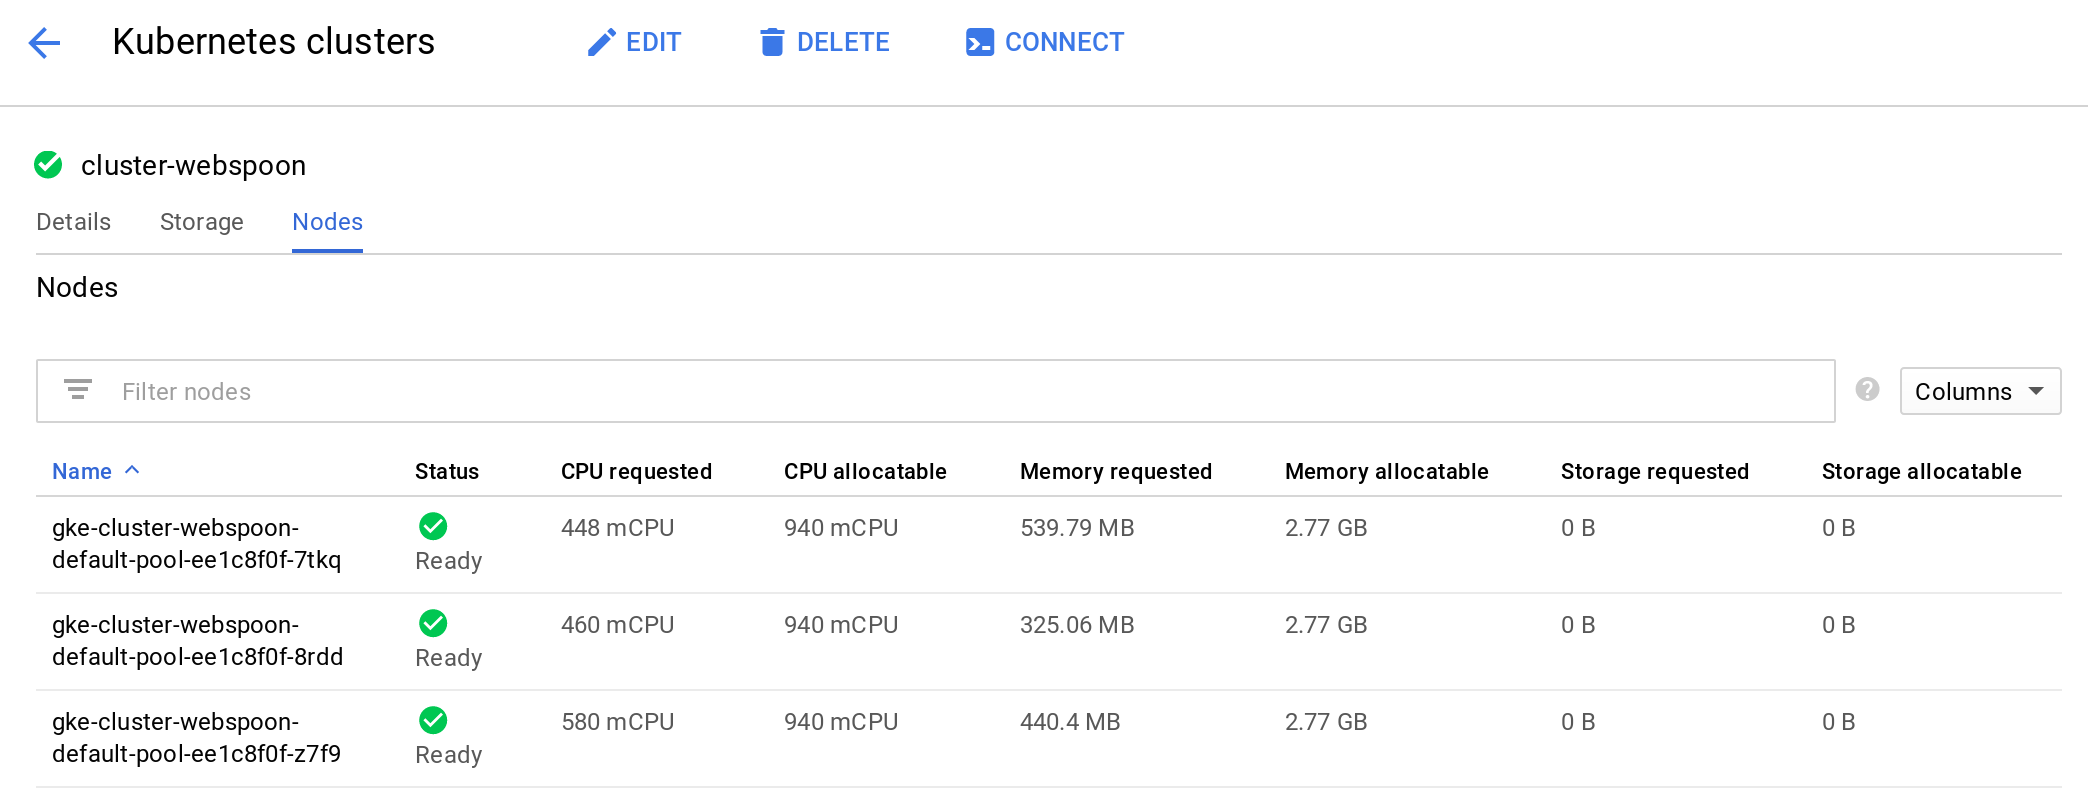
It will take a few minutes for the cluster to initialise. Once ready, you can also check the cluster details via the GCP console:
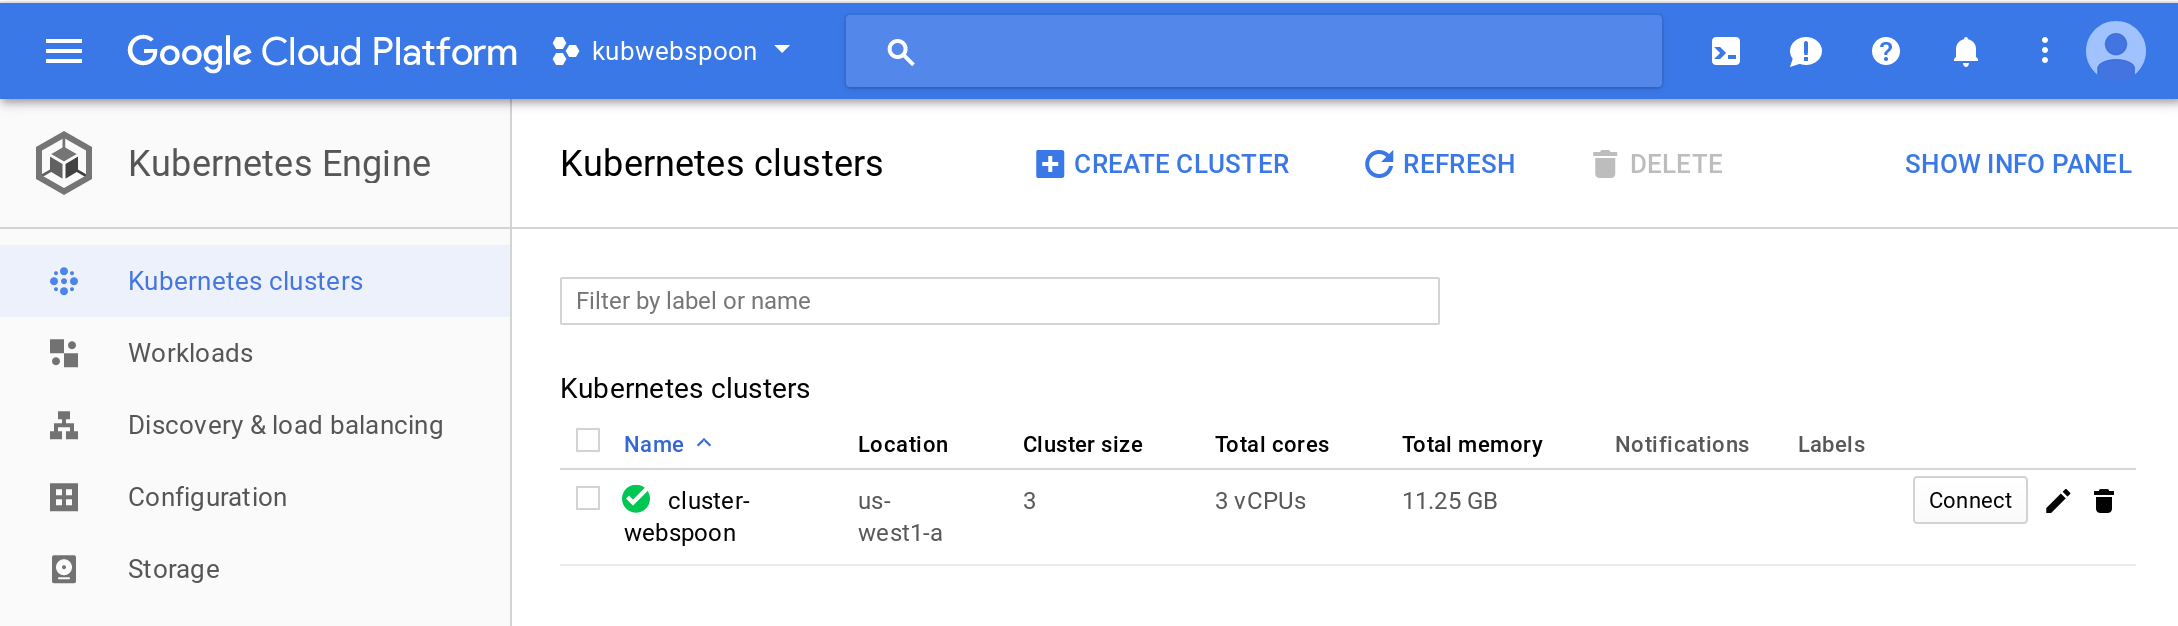
Via this page you can retrieve details on the available nodes and other useful info. E.g. you can see, that by default 3 nodes got created:
Next we have to retrieve the authentication details:
# get authentication credentials to interact with cluster
gcloud container clusters get-credentials webspoon-cluster
The last command fetches cluster endpoint and auth data and generates a kubeconfig entry for our project. This will link our Google Cloud Platform details with the kubectl command. In other words, kubectl is aware of our deployment environment now.
Let’s deploy our application:
# deploy application
kubectl run webspoon-server --image hiromuhota/webspoon:0.8.0.13-full --port 8080 --env="JAVA_OPTS=-Xms1024m -Xmx1920m"
Note: If in doubt, one of the best ways to figure out how to define options for the
kubectl runcommand is to execute the following:
kubectl help run
Note: To pull an image from Docker Hub instead of Google Cloud Registry, just specify the standard Google Hub path - nice and easy, no other changes required! (We applied this above, just in case you wonder).
Note: Since we want to create a reproducible state, we pull a specific tag of the image, not
:latest!
Via the GCP web console Workloads Dashboard you can see what’s going on in your cluster:
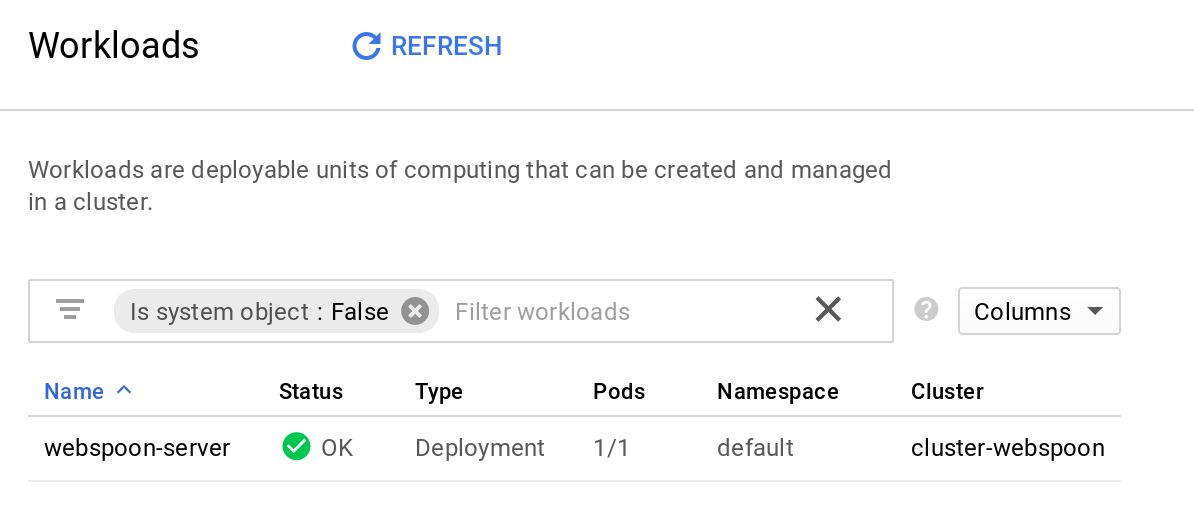
As expected, there is one webspoon-server pod running.
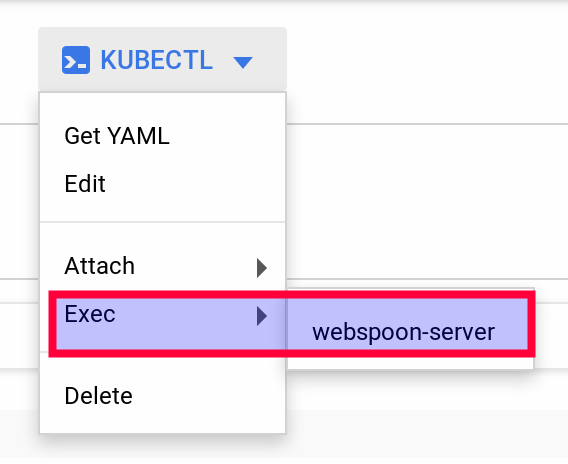
You can click on the Pod name, which will get you to the Deployment details page. Apart from seeing the details, you can also use the Actions menu to expose the pod, start auto-scaling, rolling updates etc. The Kubectl menu provides options to export the configuration as a YAML file (among other options). If you scroll to the bottom of this page, you’ll find the Managed pods section. Click on the pod name link and that will get you to the Pod details page. A very nice option here is that you can connect to the pod via a web terminal (Kubectl > Exec > webspoon-server):
As originally stated, we will not use the Web UI for configuration, but continue on the command line.
If we were interest in checking if the JAVA_OPTS were correctly set within the container, we could log into it like so:
# list running pods
$ kubectl get pods
NAME                               READY     STATUS    RESTARTS   AGE
webspoon-server-2240090095-dvkdp   1/1       Running   0          14m
# webspoon-server-2240090095-dvkdp is the PODNAME in this case
# below, replace PODNAME with yours
$ kubectl exec -it [PODNAME] -c webspoon-server -- /bin/bash
root@[PODNAME]:/usr/local/tomcat# env | grep JAVA
JAVA_OPTS=-Xms1024m -Xmx1920m
JAVA_HOME=/docker-java-home/jre
JAVA_VERSION=8u151
CA_CERTIFICATES_JAVA_VERSION=20170531+nmu1
JAVA_DEBIAN_VERSION=8u151-b12-1~deb9u1
Let’s now add some networking configuration by means of service in order to be able to access Webspoon from the outside world:
# expose your app via a service
kubectl expose deployment webspoon-server --type "LoadBalancer"
You can inspect details on this service via the Discovery & load balancing dashboard:

There are also options to retrieve details via your local command line:
# inspect application
kubectl get service webspoon-server
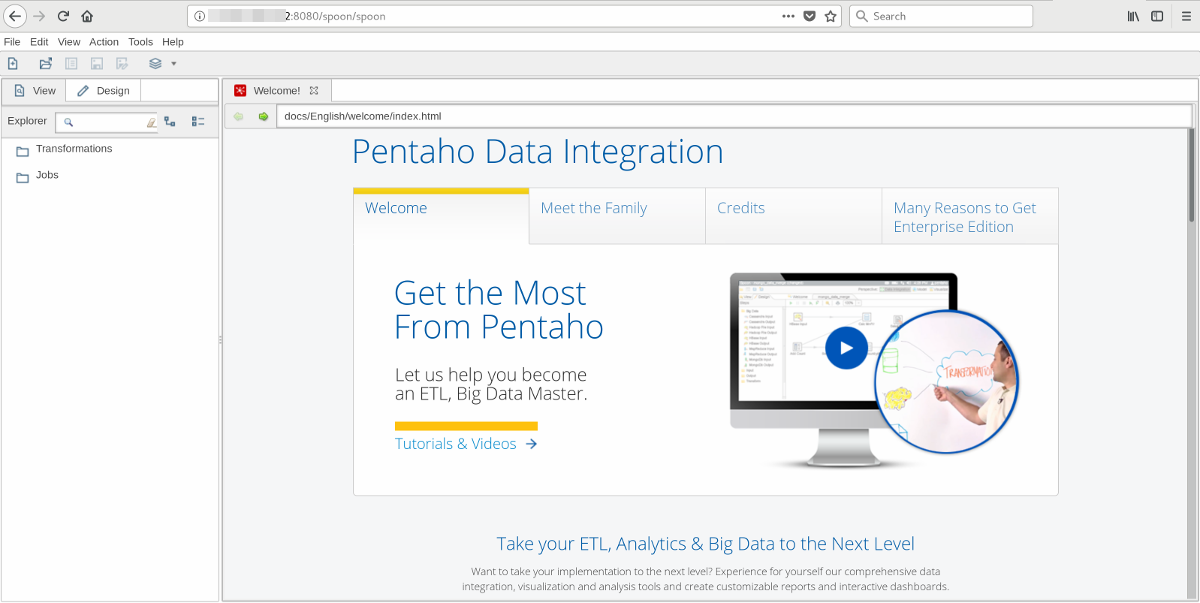
Yes, yes, yes, you want to know how to access the actual WebSpoon UI:
Get the external IP address:
kubectl describe services/webspoon-server
In the return message look for the IP mentioned next to LoadBalancer Ingress.
Then type this into your web browser:
http://[LOADBALANCERINGRESSIP]:8080/spoon/spoon
Remember that in the beginning I mentioned that this imperative approach of setting the environment up is not best practice? We can get a headstart for the next section, where we will explore the declarative approach by downloading the declarative Deployments file that got created automatically in the background for us:
$ kubectl get deployment webspoon-server -o yaml
apiVersion: extensions/v1beta1
kind: Deployment
metadata:
  annotations:
    deployment.kubernetes.io/revision: "1"
  creationTimestamp: 2018-02-04T12:18:58Z
  generation: 1
  labels:
    run: webspoon-server
...
The same applies to the service:
$ kubectl get services/webspoon-server -o yaml
apiVersion: v1
kind: Service
metadata:
  creationTimestamp: 2018-02-04T17:47:09Z
  labels:
    run: webspoon-server
  name: webspoon-server
...
Finally, we might want to destroy the environment to stop incurring charges:
## destroy app
# destroy service
kubectl delete service webspoon-server
# delete cluster
gcloud container clusters delete webspoon-cluster
Declarative Approach
While the gcloud container clusters create command provides defaults for many settings, you might want to define the machine type and the number of nodes.
You can find info on the GCP machine types here or alternatively you can run this command:
gcloud compute machine-types list
Let’s create a cluster with 3 nodes and machine type n1-standard-1 :
# create kubernetes engine cluster
# running command again after enabling API
gcloud container clusters create webspoon-cluster --machine-type=n1-standard-1 --num-nodes=3
# get authentication credentials to interact with cluster
gcloud container clusters get-credentials webspoon-cluster
Create a file called webspoon-deployment.yaml:
apiVersion: extensions/v1beta1
kind: Deployment
metadata:
  name: webspoon-deployment
spec:
  replicas: 2
  minReadySeconds: 20
  strategy:
    type: RollingUpdate
    rollingUpdate:
        maxUnavailable: 1
        maxSurge: 1
  template:
    metadata:
      labels:
        app: webspoon-server
        zone: dev
        version: v1
    spec:
      containers:
      - name: webspoon
        image: hiromuhota/webspoon:0.8.0.13-full
        ports:
        - containerPort: 8080
          protocol: TCP
        resources:
          requests:
            memory: "2Gi"
            cpu: "1"
        env:
          - name: JAVA_OPTS
            value: "-Xms1024m -Xmx1920m"
Upload the config file:
kubectl apply -f [PATHTOFILE]/webspoon-deployment.yaml
# my version
kubectl apply -f /home/dsteiner/git/diethardsteiner.github.io/sample-files/pdi/webspoon/kubernetes/webspoon-deployment.yaml
Note: The
kubectl apply -fcommand also accepts a directory as input. This is particular useful when you have more than one configuration file to load (as you can imagine).
Create a file called webspoon-service.yaml:
apiVersion: v1
kind: Service
metadata:
  name: webspoon-service
  labels:
    app: webspoon-server
    zone: dev
spec:
  ports:
  - nodePort: 30702
    port: 8080
    protocol: TCP
    targetPort: 8080
  selector:
    run: webspoon-server
  sessionAffinity: None
  type: LoadBalancer
In a bit Webspoon is available on:
http://[LOADBALANCERIP]:8080/spoon/spoon
E voila, that’s it! We have a load balanced Webspoon cluster! Nice and easy. And we get all the benefits: if containers or pods fall over, we automatically get new ones, uprades and rollbacks are easy etc etc.
Note that if you upload new versions of these config files, a revision will be created - so you can always fallback to a previous version if required. You should commit each version of the config file to your git repo.
Important: This setup has no security in place, so whoever gets hold of the IP address can log on. I strongly recommend that you set up security for Webspoon.
Finally, we might want to destroy the environment to stop incurring charges:
## destroy app
# destroy service
kubectl delete service webspoon-server
# delete cluster
gcloud container clusters delete webspoon-cluster
In the next blog post we will take a look at how to define a volume so that data gets persisted in case a container falls over.