In this article we will discuss sourcing a stream of data from a MQTT topic with Apache Hop.
Let’s first start with a short intro to MQTT:
What is MQTT?
MQTT: The Standard for IoT Messaging
MQTT - Message Queuing Telemetry Transport
“MQTT is a lightweight publish/subscribe messaging protocol. It is useful for use with low power sensors, but is applicable to many scenarios.” Soure.
MQTT is build on the publish-and-subscribe model. Messages are published to topics and topics do not have to be created beforehand: Simply sending a message to a topic will create the topic. Multiple clients can subscribe to a topic. When clients subscribe to a topic, they can either subscribe to specific topics (based on an explicit path) or several topics by using wildcards. MQTT supports the 3 common Quality of Service levels: at most once (meaning you might or might not receive the message - no guarantee), exactly once and at least once (meaning you will receive the message but there could be duplicates). MQTT provides also the option to store messages, so in case a client subscribes late in the game, it will receive previously sent messages.
What is Apache Hop?
It’s your Swiss army knife for data processing - even better, it’s for free.
How do Apache Hop and MQTT fit together?
Apache Hop can read and write data to many systems: Database tables, files, streams. It might not cover every technology out there, but the coverage is pretty wide and if there is a feature missing, it can always be extended via a plugin.
So MQTT is just one of the streaming technology that Apache Hop can write to and read from: Hop basically provides you the connectors to interact with MQTT.
Eclipse Mosquitto
Installation
Download Eclipse Mosquitto, an open-source MQTT broker, from here.
Alternatively install it via package manager:
On MacOS install it via Brew:
brew install mosquitto
On Linux distros via Snap:
snap install mosquitto
Or you can use the Docker image as well (see here):
# docker pull eclipse-mosquitto
docker run -it -p 1883:1883 -p 9001:9001 eclipse-mosquitto:latest
For an in-depth coverage of Mosquitto, take a look at the Mosquitto Documentation.
I installed Mosquitto via Brew and it provided this useful information:
mosquitto has been installed with a default configuration file.
You can make changes to the configuration by editing:
    /usr/local/etc/mosquitto/mosquitto.conf

To have launchd start mosquitto now and restart at login:
  brew services start mosquitto
Or, if you don't want/need a background service you can just run:
  mosquitto -c /usr/local/etc/mosquitto/mosquitto.conf
Send your first message to the MQTT queue
Let’s start the Mosquitto Server/Broker:
mosquitto -c /usr/local/etc/mosquitto/mosquitto.conf
# on MacOS alternatively
brew services start mosquitto
The official MQTT install comes with CLI clients to publish and subscribe to MQTT topics:
To subscribe to a specific topic we can use this command:
mosquitto_sub -t demos/hop-demo
This will automatically create the queue as well.
To publish a message to the demos/hop-demo topic we can use this command (run this in another Terminal window):
mosquitto_pub -t demos/hop-demo -m "Hello MQTT"
In our case there is no need to define the host (-h) flag since the default is set to localhost.
Resouces:
You can also test one of the sample MQTT topics provided by the Mosquitto project:
mosquitto_sub -h test.mosquitto.org -t "bbc/#" -v
Apache Hop
Installation
Download Apache Hop from here and extract in a conenient directory. (Note: If the MQTT transforms are not part of this package, you will have to build Hop from source).
On the Terminal navigate to the install directory and run the below command to start the Hop GUI:
cd <HOP-ROOT-DIR>
./hop-gui.sh
This will bring up the Designer interface.
Our first Pipeline
The default workspace/project is loaded when opening the Hop GUI for the first time. For a quick demo like this one we can just use this default project.
Let’s start with a super simple test: All we want to do is consume one message with Hop from a MQTT topic.
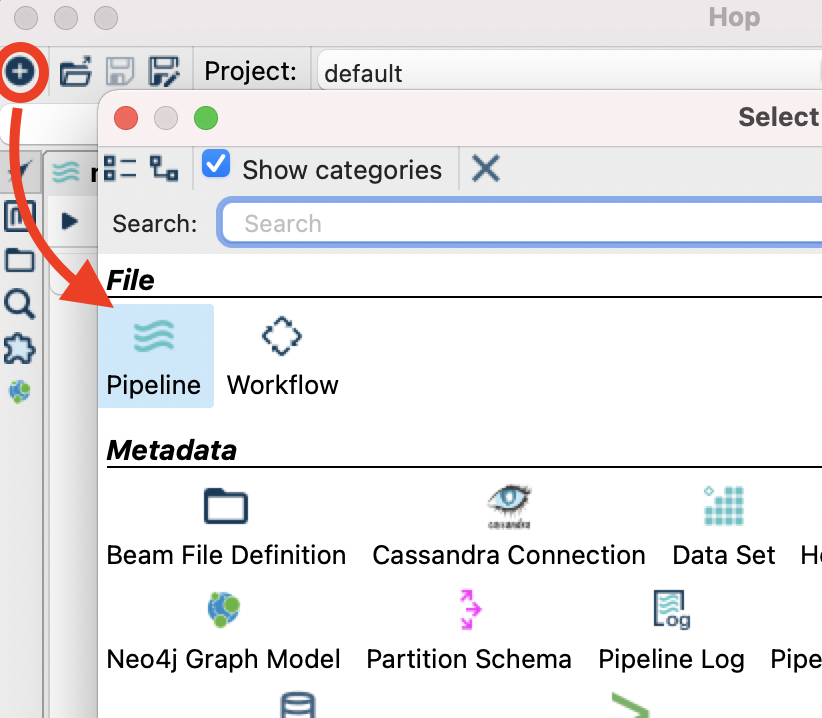
Create a new pipeline by clicking the + icon in the top left corner. In the upcoming dialog choose Pipeline.
Single click on the canvas and search for MQTT in the action dialog, then pick MQTT Subscriber.
Double click on the MQTT Subscriber transform to bring up the Settings dialog and provide some details:
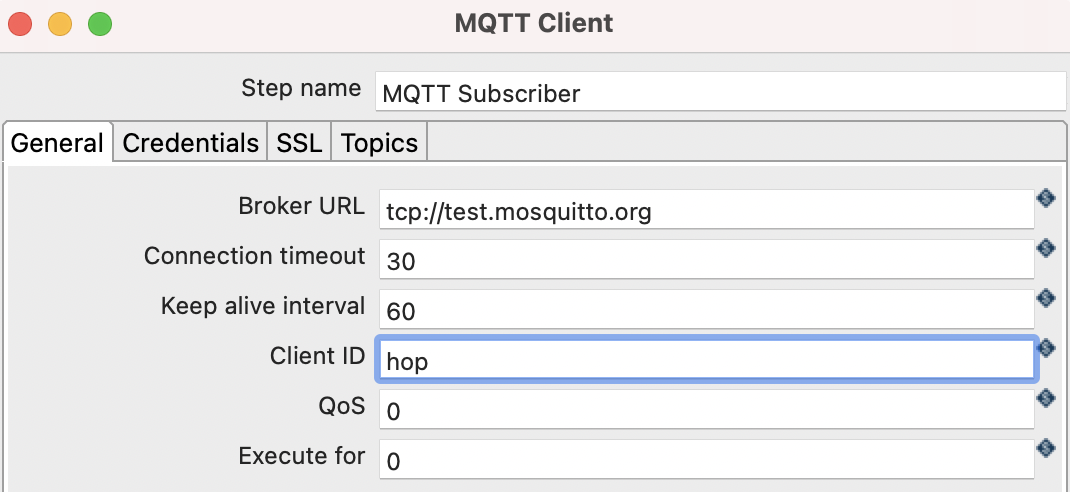
- The Broker URL has to be prefixed with the protocol
tcp://and also has to include the port, e.g.tcp://localhost:1883. - Set Execute for to a high value, e.g.
50000or alternatively set it to-1which will run the pipeline indefinitely. - As topic set e.g.
demos/hop-demo.
Save and run the pipeline (by clicking the Execute button). Now we just need some messages - we can create them manually for now by issuing this command in the Terminal:
mosquitto_pub -h localhost -t demos/hop-demo -m "Hello MQTT"
(-h localhost is not really required here)
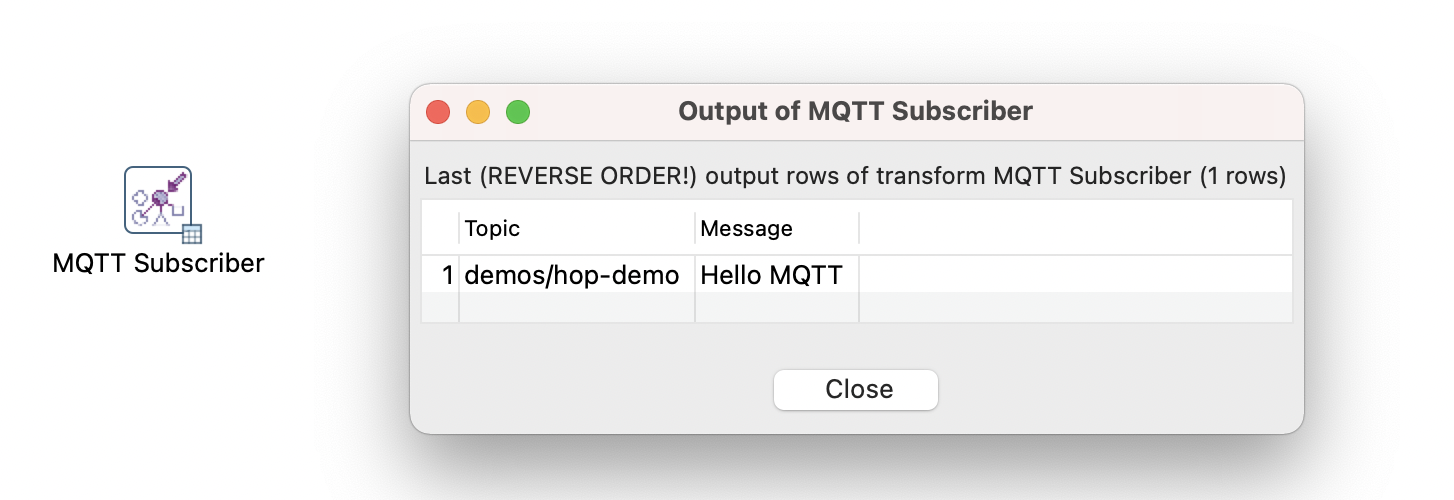
The MQTT Subscriber transform will show a little table icon in the bottom right corner. Click on it to preview the data:
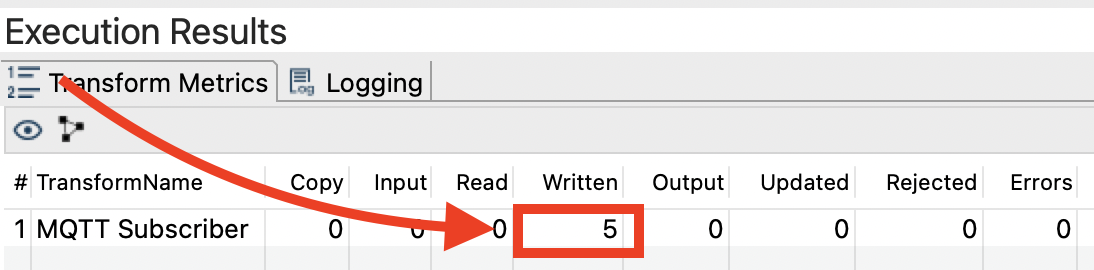
Send a few more messages by executing the following command a few times:
mosquitto_pub -h localhost -t demos/hop-demo -m "Hello MQTT"
Notice how the row counter increases in the Hop GUI:
The MQTT message payload can be any type of data: text, an image, JSON object etc.
A very simple JSON object looks like this:
{ "City": "Cologne"}
A slighly more complex JSON object:
A JSON payload made up of an Integer, String and Boolean value:
{
  "SampleData": {
    "Length": 123,
    "City": "Cologne",
    "Visible": true
  }
}
See also An Introduction to JSON and MQTT with Roger Light
The definition JSON Object starts with curly brackets and one key, in this example, called SampleData that holds data for Length, City and Visible inside another object (again donated by curly brackets).
Here is another example from a weather station:
{
	"Readings": {
    "Timestamp": "2021-03-12T12:23:00",
		"Altitude": 31,
		"Longitude": -0.3023,
		"Temperature": 32,
		"Humidity": 67
	}
}
Let’s try sending this JSON payload:
mosquitto_pub -h localhost -t demos/hop-demo -m '{"Readings": {"Timestamp": "2021-03-12T12:23:00","Altitude": 31,"Longitude": -0.3023,"Temperature": 32, "Humidity": 67}}'
Two useful online tools for JSON path validation:
- https://jsonpath.com
- https://jsonpathfinder.com: This one even creates the path for you.
We can use Hop’s JSON Input transform to extract the data from the JSON object - I leave this exercise to you.
Subscribing to a BBC topic
Ok, creating our messages manually isn’t really that exciting. Sure, we could write some code to automate this, however, we are in luck since there are some public MQTT topics available that we can just subscribe to.
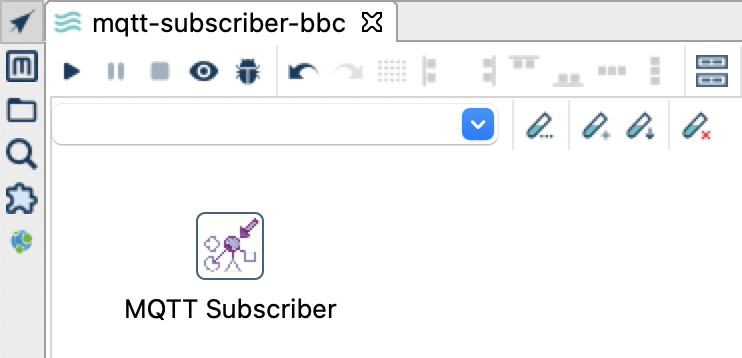
Create a new pipeline by clicking the + icon on the top left corner, then pick Pipeline. Save the pipeline as mqtt-subscriber.
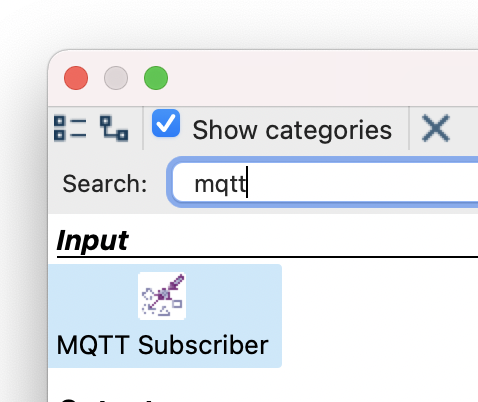
Single-click on the canvas, type mqtt into the search box of the action dialog and pick the MQTT Subscriber transform:
Your pipeline should look like this now:
Double click on the MQTT Subscriber transform icon and configure it like so:
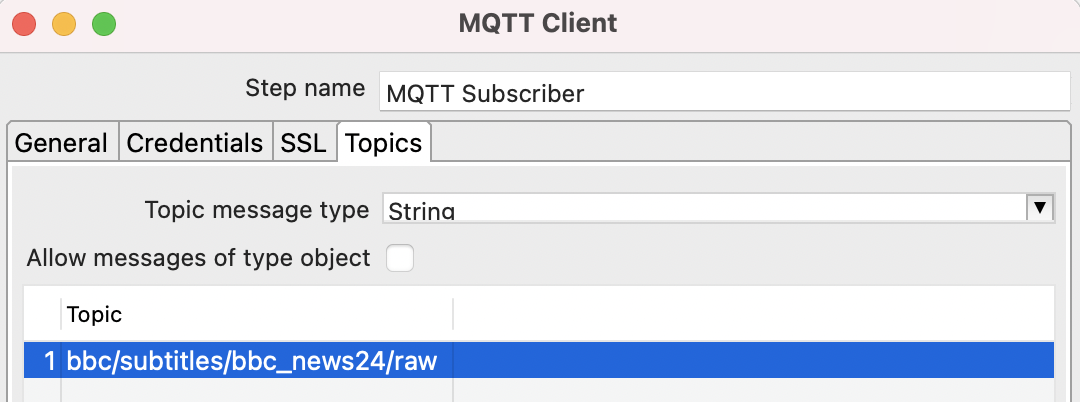
Click on the Topics tab and configure it like so:
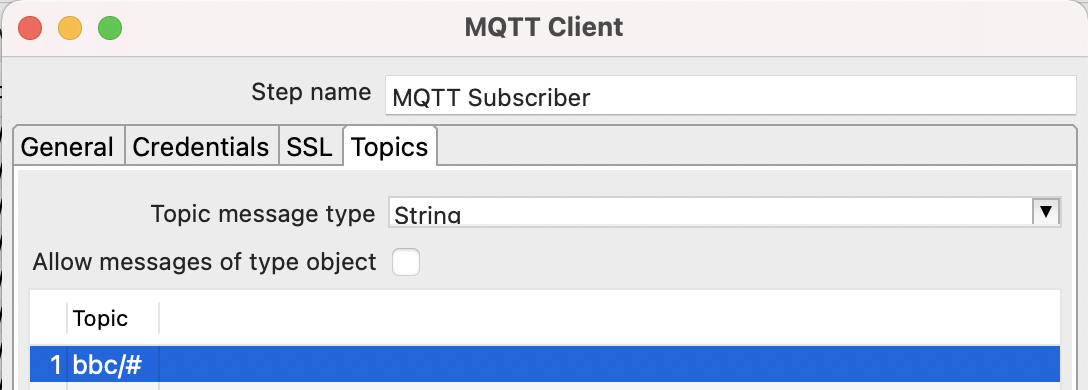
The hash in the topic path acts like a wildcard, so basically we subscribe to several topics here.
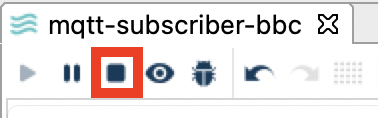
Click OK and then run the pipeline by clicking on the run/play button:
Click on the little table icon at the bottom right corner of the MQTT Subscriber transform icon to see the preview:
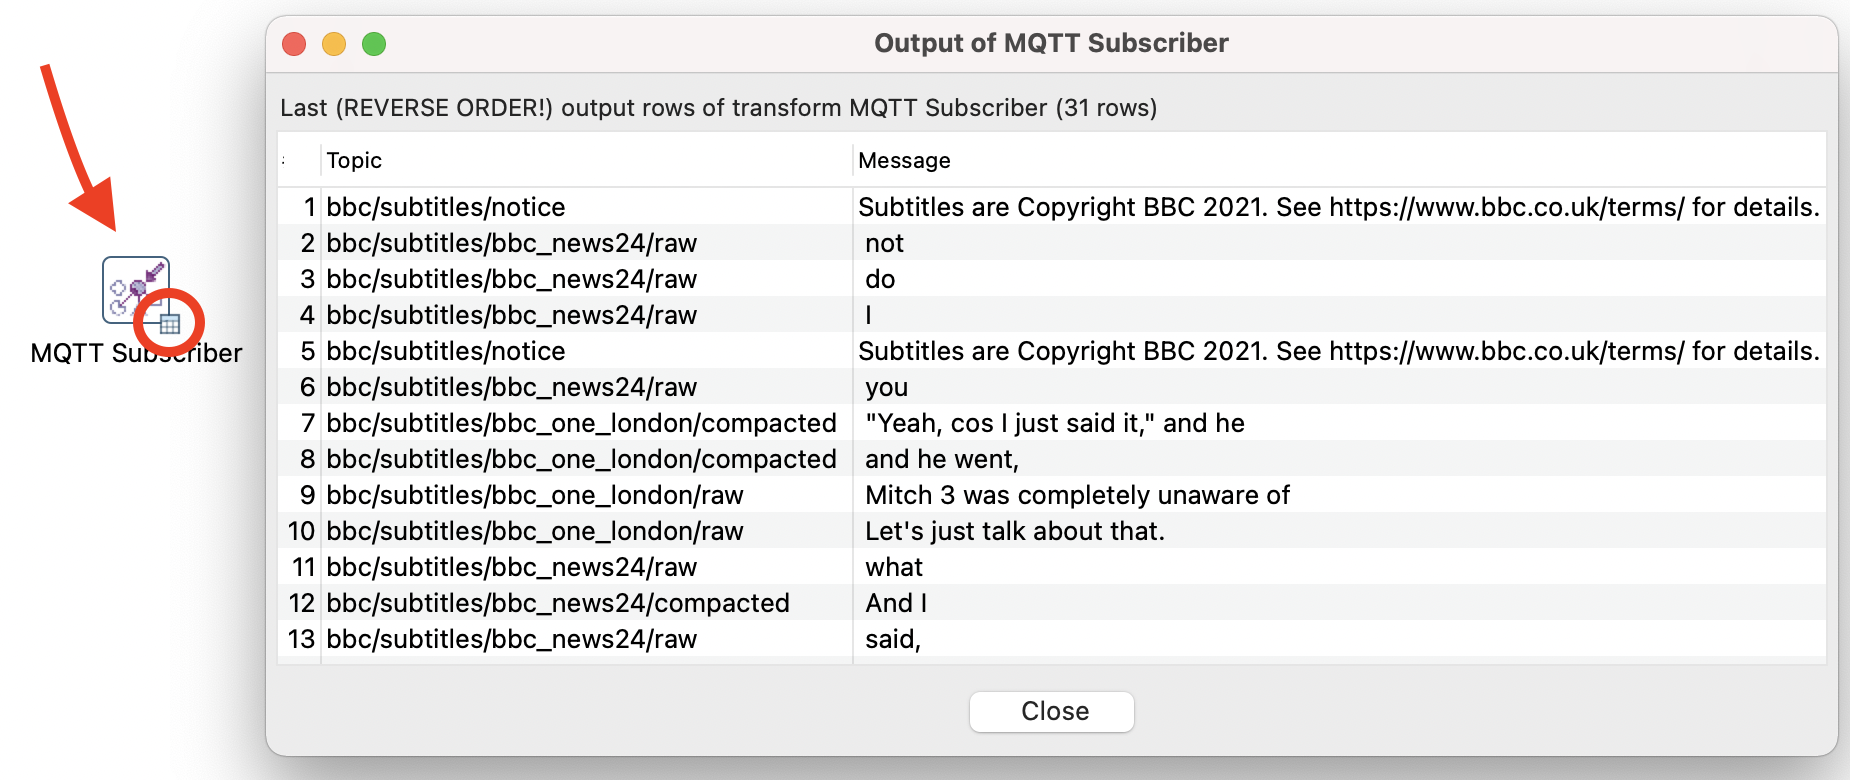
Don’t forget to stop the execution of the pipeline:
Let’s change our MQTT Subscriber config to source data only from the BBC News24 topic:
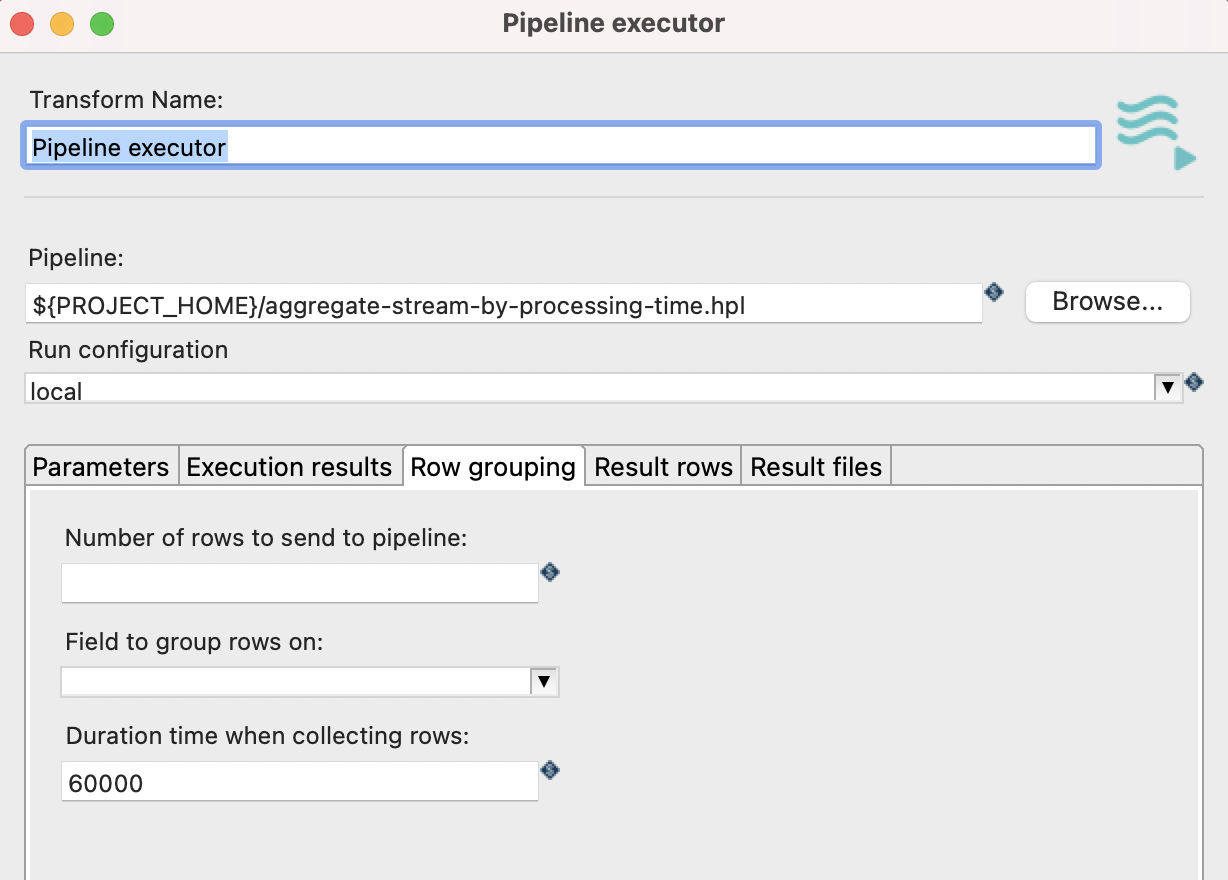
The Row Grouping functionality of the Pipeline Executor allows you to process the data coming from a stream in batches. Records can be grouped by time (in milliseconds) or by number of records. There might be several use cases for this (e.g. writing out records to a file in batches), however, stream-style windowing isn’t really one of them. We will nevertheless try to use it for aggregating data for a 60 second window just to illustrate the shortcomings.
Add Pipeline Executor transform to the canvas and connect the MQTT Subscriber transform to this one. In the Row Grouping tab set Duration time when collecting rows to 60000 (1 min):
Next add a Dummy transform and connect the Pipeline Executor to it making sure you pick the results option (not execution results).
Next we need a pipeline that we will run via the Pipeline Executor. So create a new pipeline called aggregate-stream-by-processing-time and reference it from within the Pipeline Executor .
Next create the aggregation logic for aggregate-stream-by-processing-time:
- Add a Get rows from result transform: Specify the incoming fields
TopicandMessage- both of typeString. - Add a Memory Group By transform: Define no group field. Create an aggregate called
countbased on subjectmessageand set the Type to Number of Values (N). - Add a Copy rows to result transform.
And connect all in this order.

If we run our pipeline now, you will notice that the aggregation is working (check the execution metrics):
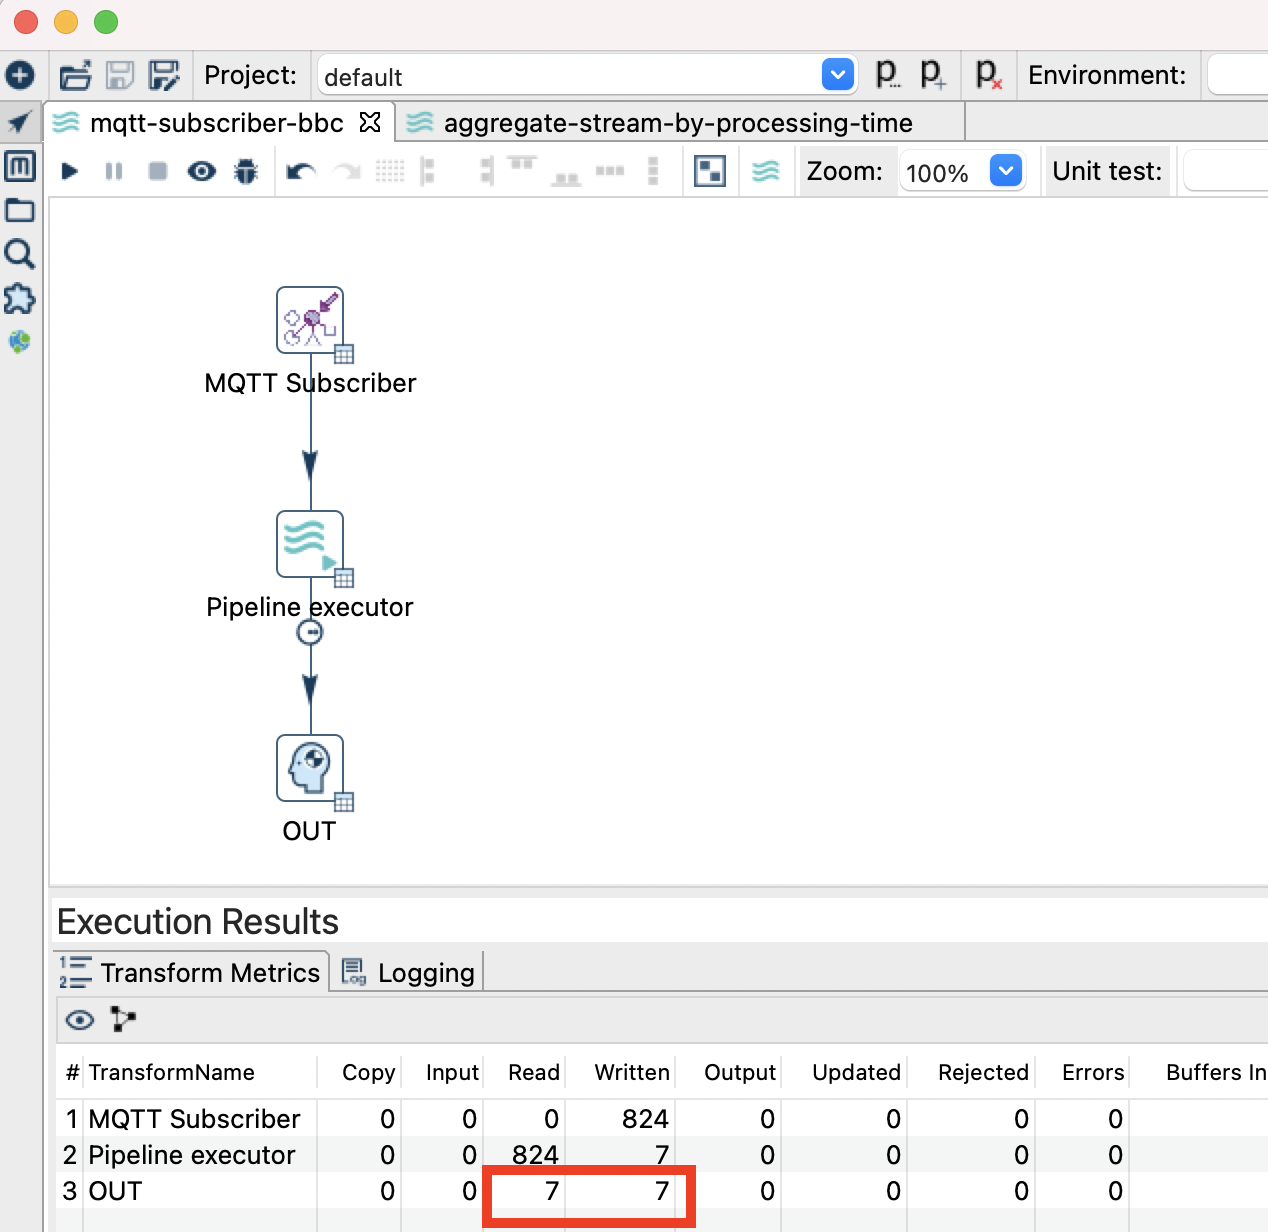
As you might have noticed, the shortcomings here are that we don’t have access to the start or end time of the window. We also don’t have an option to define an event time to base the window function on - so this is marely based on processing time, which is not really what we want.
The Beam Way
Ok, I got a bit too excited at this point! Clearly Beam could come to the rescue! And yes it can, be it not because of one missing IO transform (but the good thing about an open source project like Apache Hop is that if you bump into a problem/technical shortcoming, you can just talk to the community, create a JIRA case and hope someone implements the feature - or maybe even you are a gifted programmer and can implement it yourself).
So I wanted to see if I could use the MQTT Subscriber transform with the Apache Beam engine - turns out you can’t. At least in my case once I switched to the Beam engine, the MQTT Subscriber wasn’t producing any rows any more. I created a JIRA case to request support for the Beam MQTT IO and I shall try to update this blog post once it arrives in the Hop world … so in the meantime disregard the instructions listed below.
Normally you can use standard Hop Input transforms with Beam, however, they will not run in parallel.
Another entry that’s missing below is the Beam Timestamp transform, which should be placed between the MQTT IO and Beam Window transforms. This way an event date can be definded which then in turn can be used for the window function.
… here comes the missing part … the soon to be implemented (hopefully) Beam MQTT IO transform …
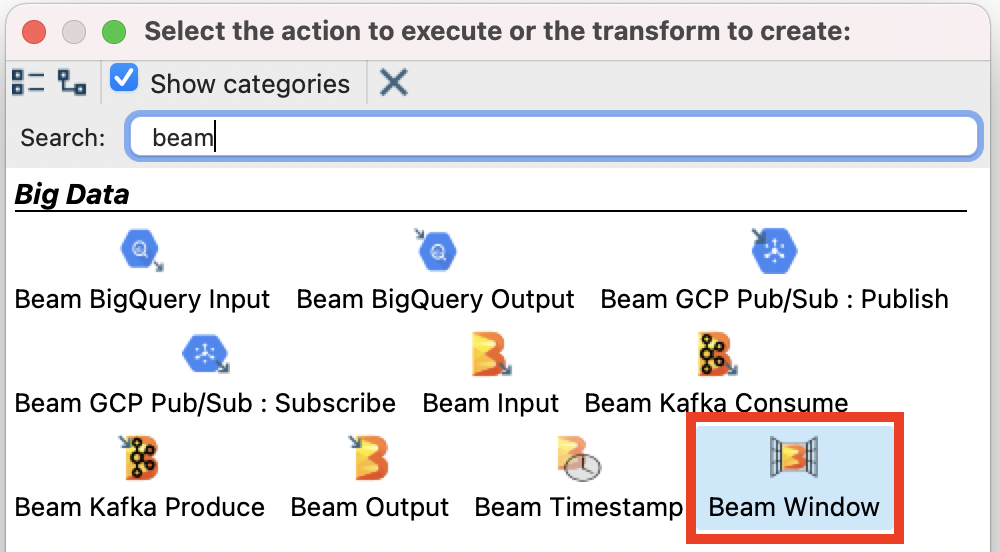
Next single-click on the canvas, type beam into the action dialog and pick Beam Window transform:
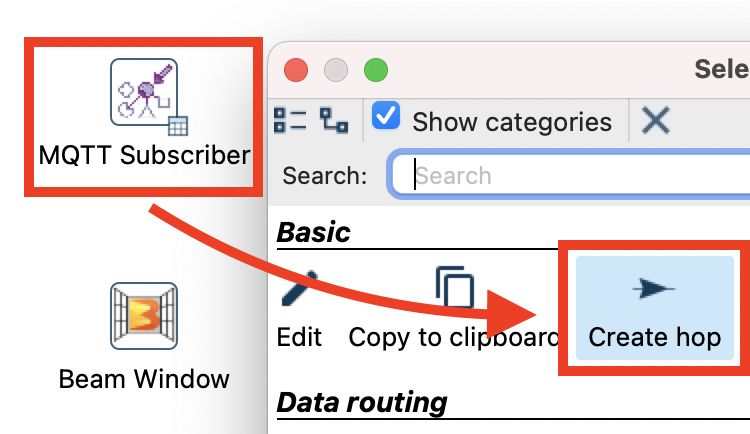
Single-click on the MQTT Subscriber transform icon and then pick Create Hop. Point the hop to the Beam Window transform icon:
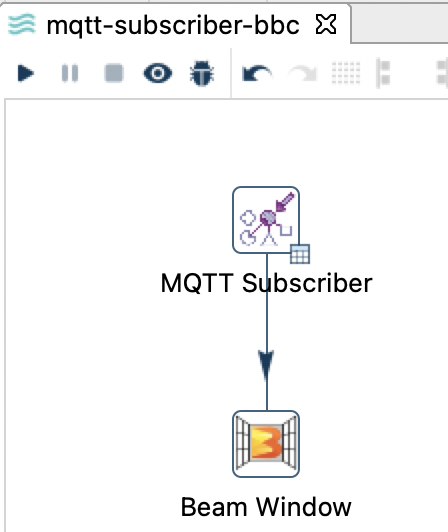
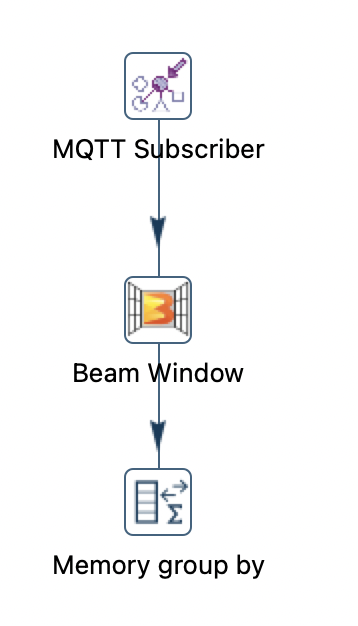
Your pipeline should look like this now:
Double click on the Beam Window transform icon to see which options are available:
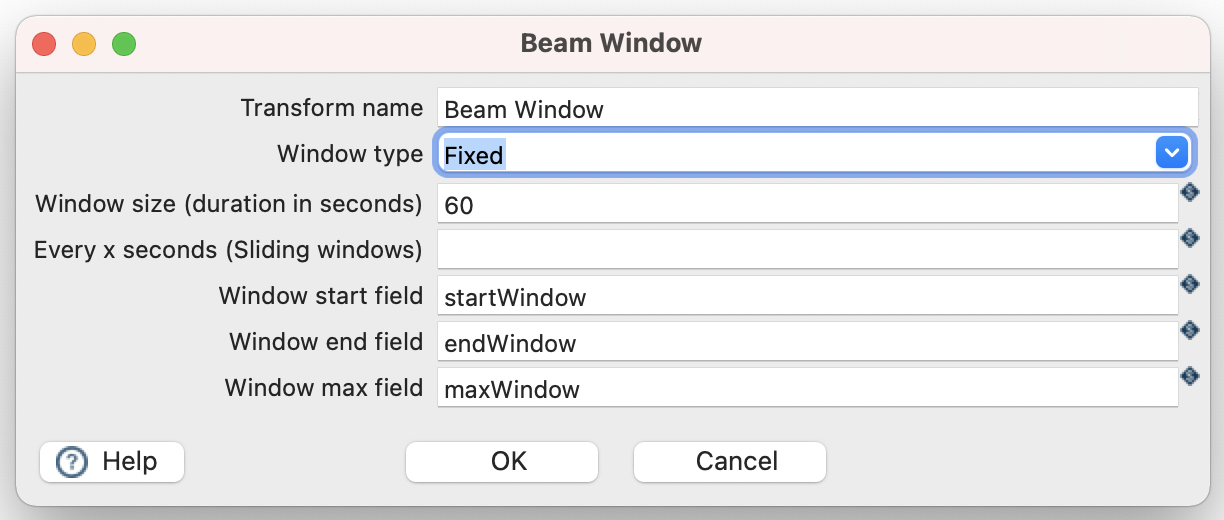
We can leave everything on the default settings for now: For our incoming stream of data, this will create windows of 60 seconds.
Apache Hop supports several engines to run a pipeline on. One of these engines is Apache Beam. Since we are making use of Apache Beam specific transforms in our pipeline, it is now time to create a dedicated Run Configuration for Apache Beam. So far we’ve been using the default run engine, which happens to be the Hop local pipeline engine.
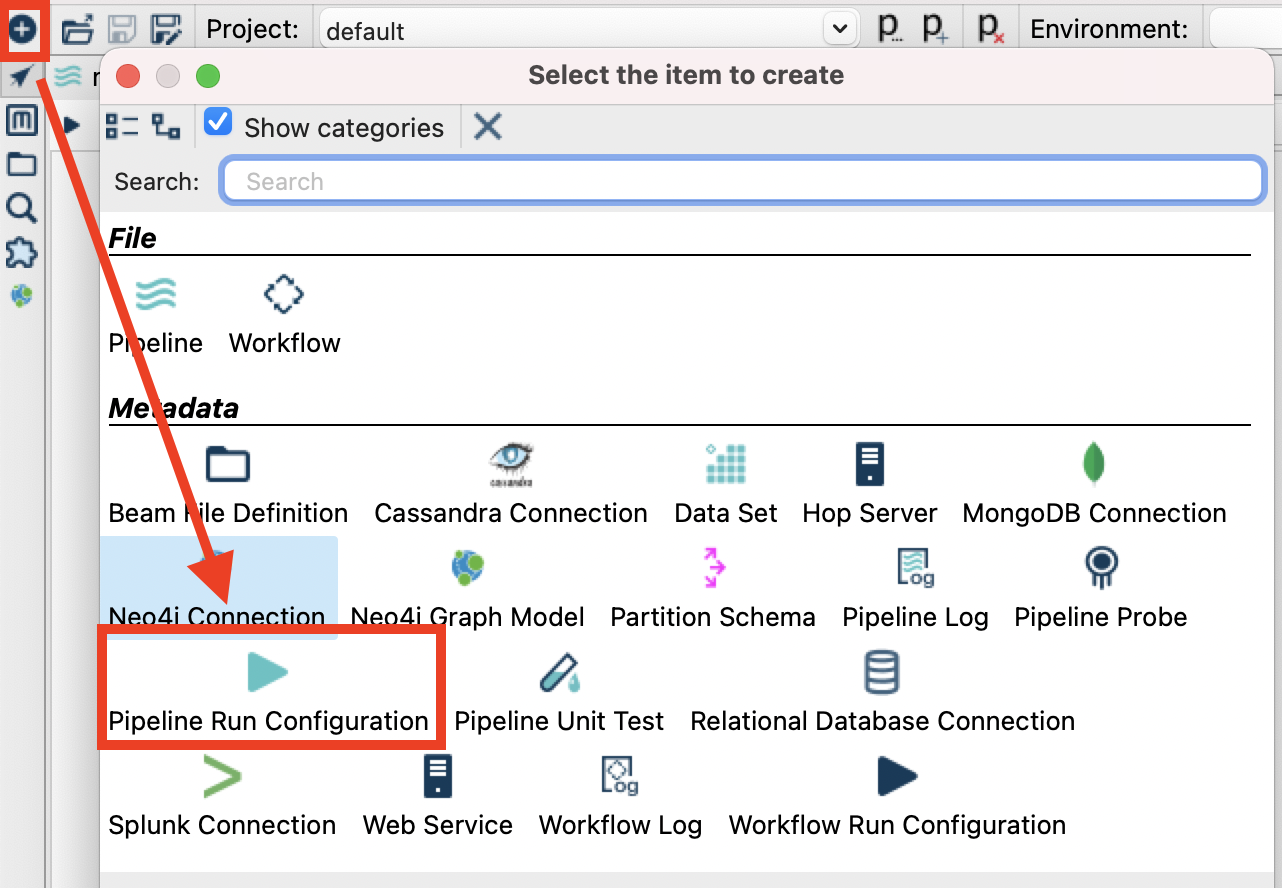
To create a new Run Configuration click the + icon in the top left corner and choose Pipeline Run Configuration:
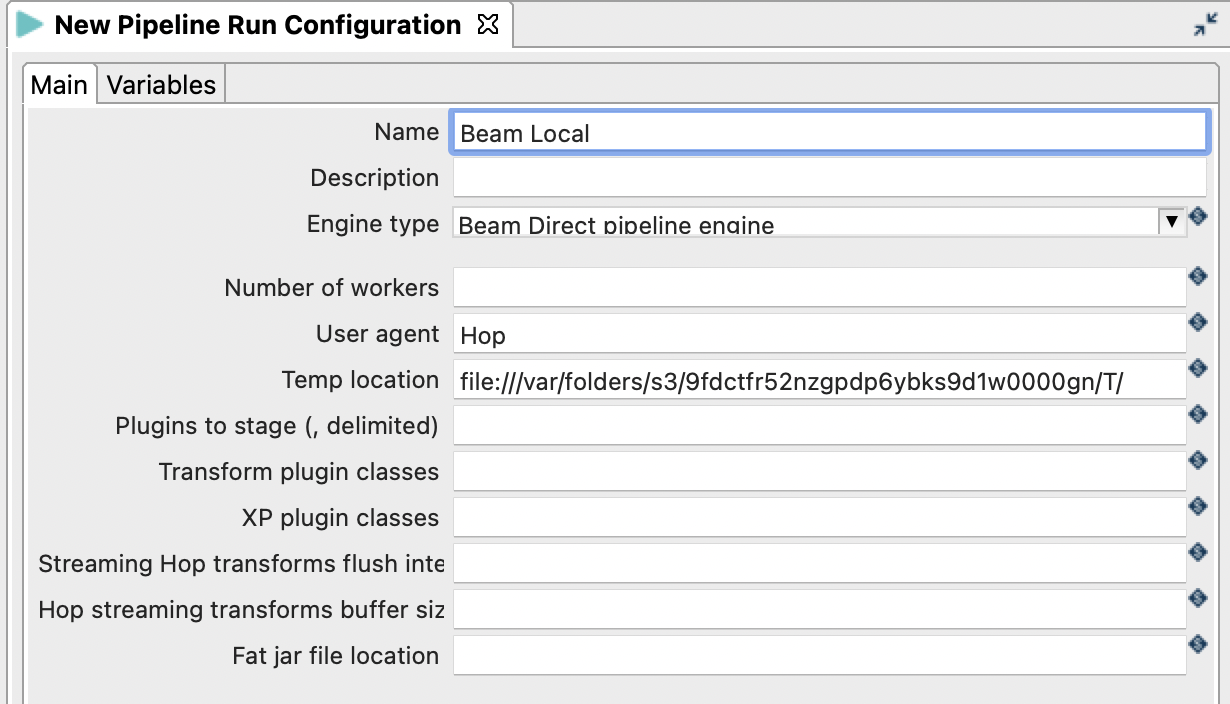
Provide a name (e.g. Beam Local) and as engine pick Beam Direct pipeline engine:
Press CMD+S (MacOS) or CTRL+S.
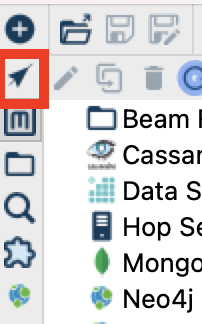
Notice that you are in Hop’s Metadata Perspective now. To return to your pipeline, click on the arrow/cursor icon on the top left:
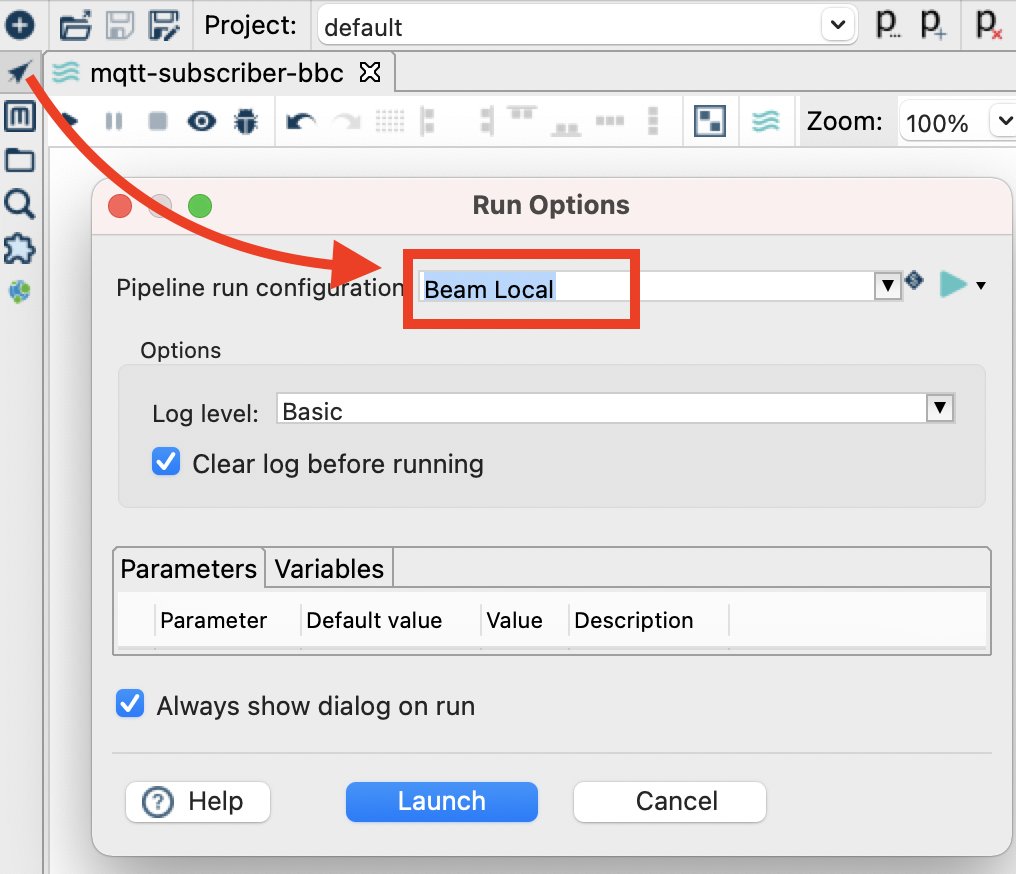
Next click on the Run/Execute button. In the upcoming dialog make sure you pick our local Beam engine and then click Launch:
Not much will happen at this stage: You will notice that our MQTT Subscriber transform still fetches records (Preview option is available) but nothing on the Beam Window.
Let’s stop the Pipeline again.
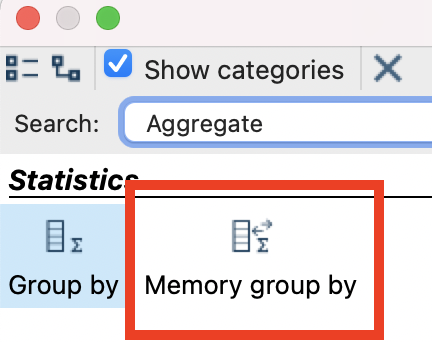
Single-click on the canvas, type Aggregate into the upcoming Action dialog and pick the Memory Group-By transform:
Create a hop from the previous transform (Beam Window) to this one:
Closing Words
The native Hop engine doesn’t have any proper support for stream windowing functions (based on event time). Ideally we want to use Apache Beam for this, which is also an engine that Apache Hop supports. Currently the Beam MQTT IO is missing in Apache Hop’s offering to make this a viable option, however, I just created a Jira request for this and hopefully soon this feature will be available within Hop as well.
If window function isn’t something that’s required for your project, then already you have a quite a few processing options with Apache Hop.